Ore Factory Squad Practical Modular Layout
Separate intake, processing, storage, and dispatch so one blocked pallet cannot stop the whole factory.
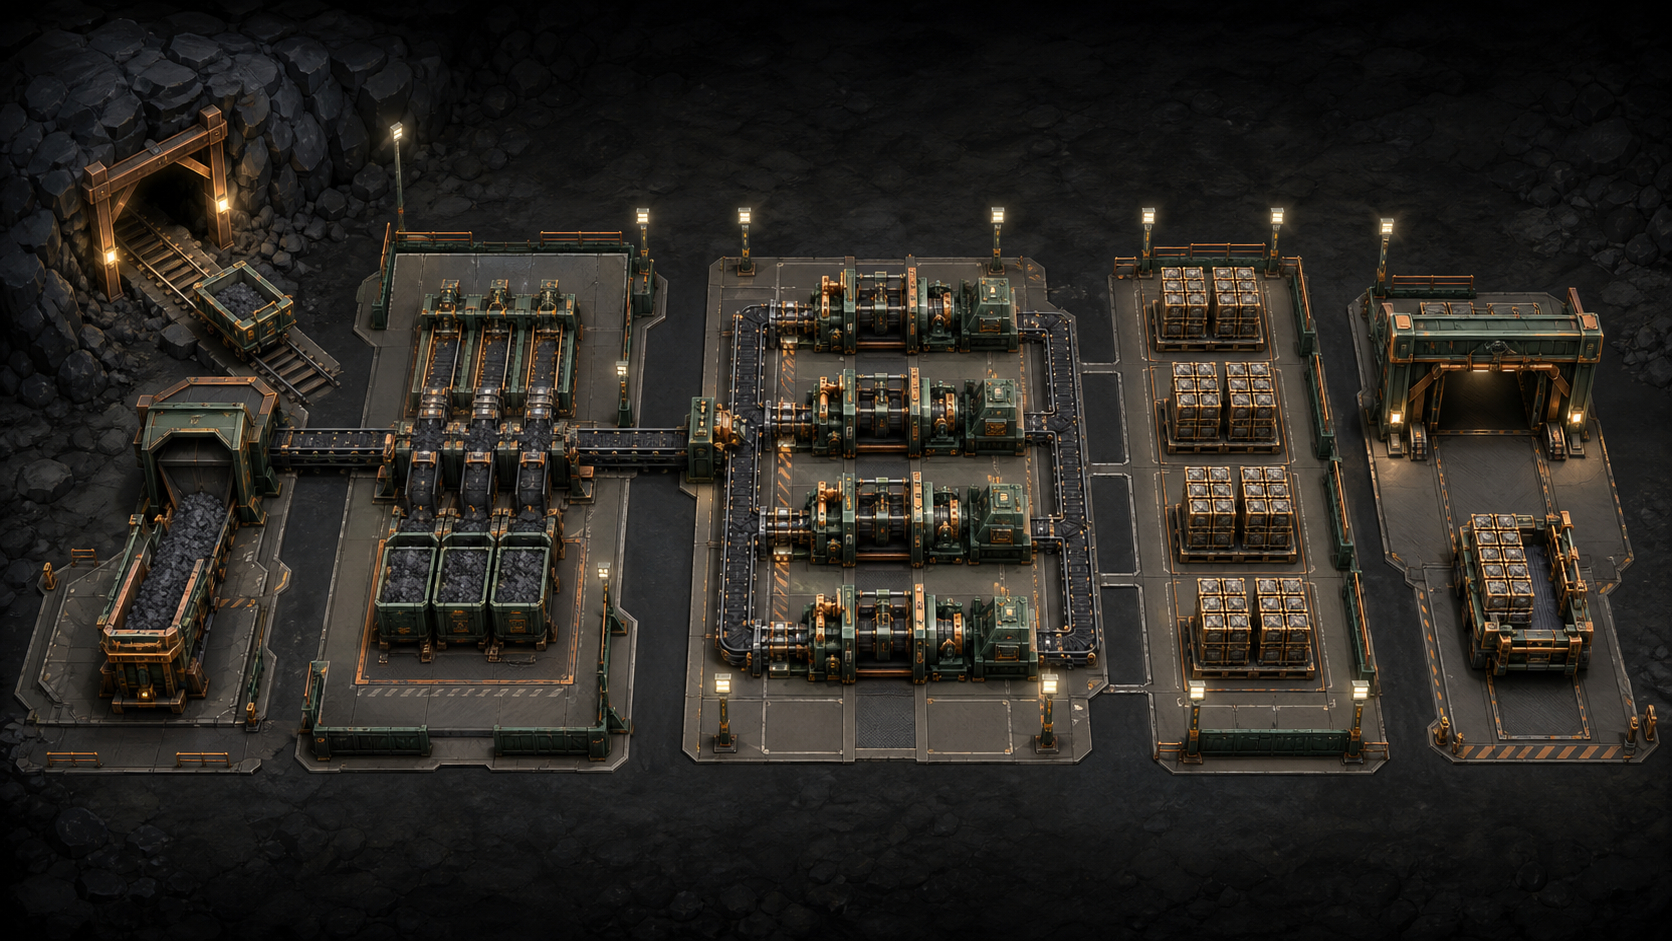
OUR DEFAULT LAYOUT
Practical baseline
Our recommended starting point is a one-way modular flow: raw intake, filtered sorting, parallel processing lanes, marked pallet storage, then separate Stock Sell and Contract dispatch. It is not a benchmarked optimum or an official blueprint.
There is no verified universal machine ratio. Add capacity at the first buffer that stays full or the first output that stays blocked.
The five-zone layout
[ Mining Lift / Truck Unload ]
              |
              v
[ Raw Intake + Sorting Buffer ]
              |
      [ Smart Splitters ]
        /      |      \
       v       v       v
[ Line A ] [ Line B ] [ Line C ]
       \       |       /
        v      v      v
[ Marked Finished-Pallet Storage ]
          /             \
         v               v
[ Stock Sell ]   [ Pallet Packer + Delivery ]
Keep these together
- unload point and raw buffer
- machine input and its local supply buffer
- finished output and marked pallet storage
- Pallet Packer and its clear Contract and Excess outputs
Keep these separate
- raw and finished pallets
- Stock Sell inventory and contract inventory
- main conveyor trunk and forklift lanes
- warehouse automation and employee assignments
Build order by factory stage
Early factory: prove one complete loop
- Choose one product you can mine, process, palletize, and sell.
- Leave one walking lane on each side of the machine chain.
- Run the first pallet through Stock Sell before adding a second product.
- Keep cash available to correct the first wrong machine or license choice.
Mid game: split by product family
OFFICIAL FEATURE + EDITORIAL METHOD
v1.0.5 officially added Smart Filters to Splitter Belts and Pallet Drop Zones. Giving each output a documented item or category and testing one pallet before connecting the next branch is our verification method.
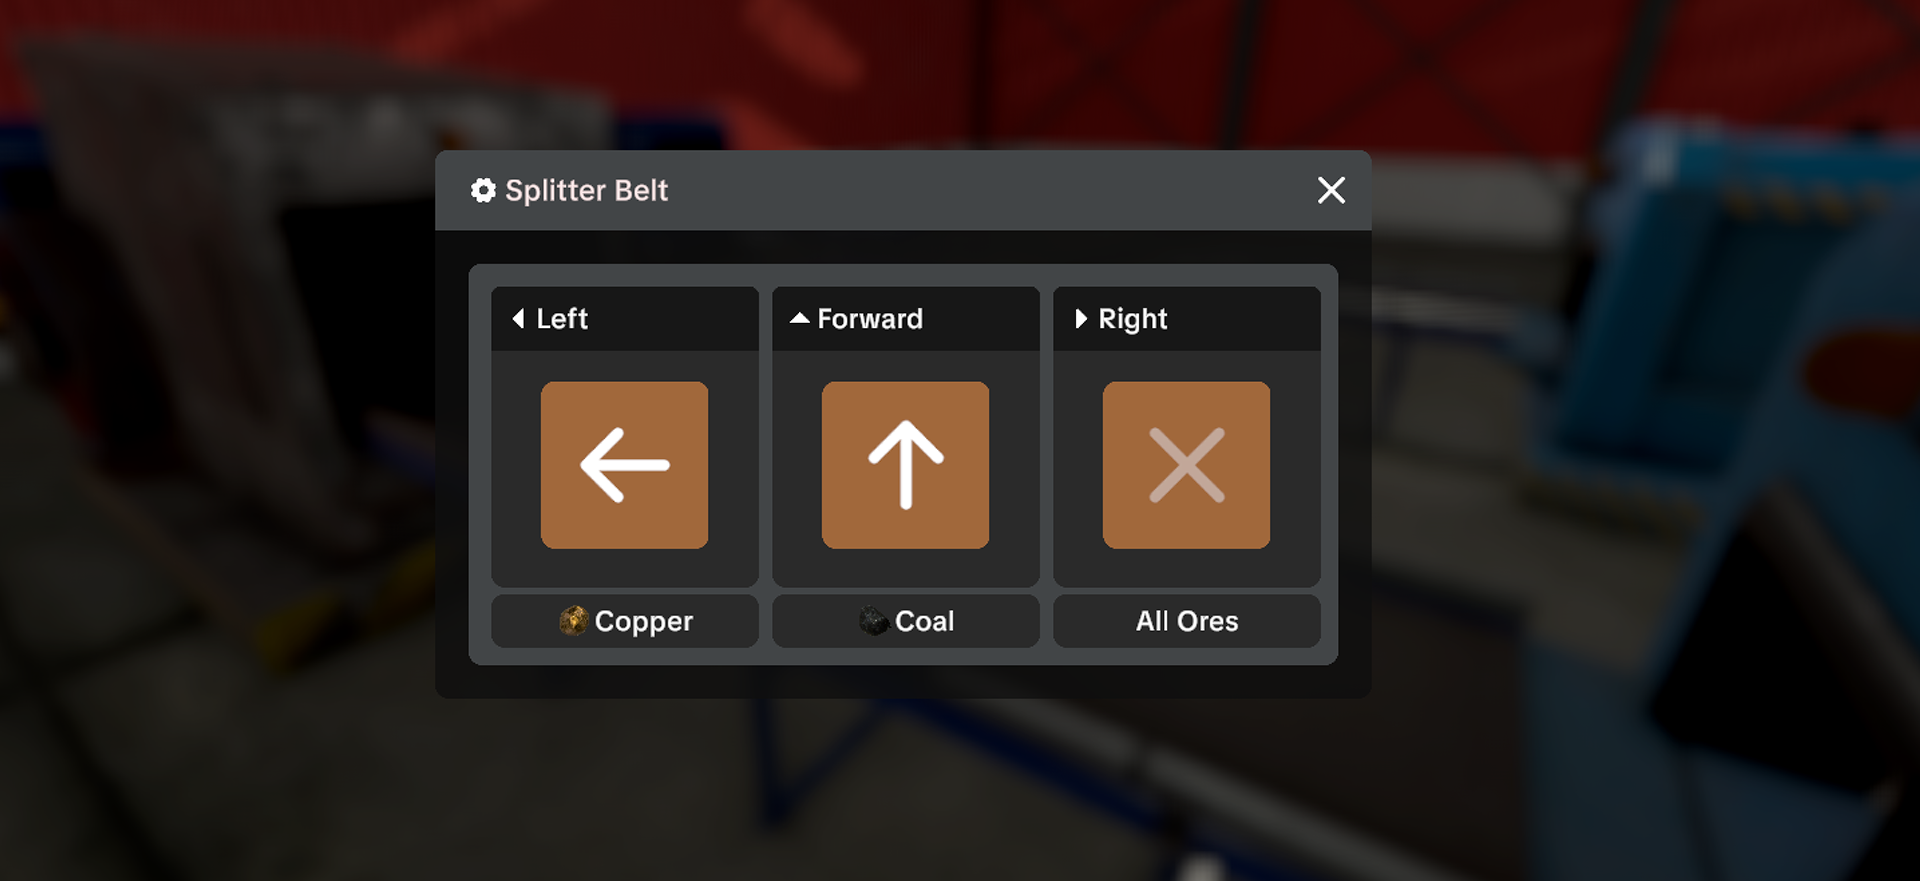
- Keep raw stone and metal routes distinct where their machines diverge.
- Add a small local buffer before a machine that frequently waits for material.
- Do not merge finished products before marked storage has identified them.
Late factory: duplicate modules, not spaghetti
When a tested line is too slow, copy its production block beside the existing line. Feed both from a controlled splitter and merge only after outputs are verified.
If forklifts, robots, and players cross the same narrow corridor, widen the logistics lane before adding more machines.
OFFICIAL v1.0.9 FEATURE + EDITORIAL LAYOUT BOUNDARY
Raised belt pieces are a routing option, not a blueprint requirement
v1.0.9 adds raised Merge, Splitter, and turn pieces for elevated belts. Use them to separate an observed crossing or make one handoff easier to inspect; the patch does not publish a clearance dimension, machine ratio, or universally best overhead layout.
- Keep the first raised merge, splitter, or turn isolated from unrelated production.
- Verify its input, output, and the lane below before adding another piece.
- Retain a reachable manual route around the area rather than assuming an overhead path solves every robot or vehicle conflict.
Find the real bottleneck
| Visible state | Likely blocker | First change |
|---|---|---|
| input always empty | mining, transport, sorting | repair supply before adding machines |
| input full, machine idle | recipe, license, socket | check selected recipe and connection |
| output stays occupied | pallet space or downstream route | clear output and verify storage |
| wrong item reaches a lane | filter or shared merge | isolate branch and retest Smart Filter |
Layout mistakes to avoid
- One trunk for everythingA wrong filter or full output can stop unrelated products.
- No service gapSockets and stuck pallets become hard to inspect or clear.
- Contracts share sell stockStock Sell can remove inventory reserved for an accepted order.
- Scaling before first outputA copied error becomes an expensive rebuild.
CURRENT-VERSION SYSTEMS + EDITORIAL DIAGNOSTIC
End-game handoff diagnostic
Storage Output → Smart Filter → Merge / Split → Buffer
       → Finished Pallet → Robot or Contract handoff
- Watch the Storage Output and name the first item that fails to leave.
- Isolate the exact filter branch before changing a Merge or Splitter.
- Use one Buffer to expose a rate mismatch; do not treat it as hidden extra throughput.
- Keep the finished-pallet output and robot approach route clear.
- Choose the Warehouse Robot priority for Storage or Packaging and Delivery to match the handoff under test.
- Restore the next branch only after one complete item or pallet reaches its destination.
The named pieces and Robot priorities are current official systems. This order is an editorial troubleshooting method, not an official best ratio or universal end-game blueprint.
Continue the build
Sources and evidence
- Official v1.1.1 hotfix (current version status)
- Official v1.1.0 Masters of Oil announcement
- Historical v1.0.9 raised belt mechanic source
- Official Smart Filter and Phase 0 notes
- MRLAY end-game setup walkthrough — auto-captioned historical demand and visual context; not proof of a best layout or current ratio.
- Solo first playthrough feedback — one player reports oil-product space pressure; not proof of a universal layout.
- Original layout illustration generated for this guide on August 2, 2026 and reviewed as a concept, not an in-game capture.